Best Spring Gel Nails Vancouver | Prép Beauty Parlour

Best Mother’s Day Mani Inspo | Prép Beauty Parlour

By | DIY, Nails, Prép Beauty Parlour

Prép Beauty Parlour

Mother’s Day is right around the corner- (Sunday May 14th! For those of you who forgot!), and what’s a better way to spend a beautiful Vancouver spring day (Just pretend it’s sunny and not the usual weather! Haha!!) than in a beautiful salon getting your piggies painted with mum!

We at Prép are super excited to see all of you pretty faces come in to get pampered! So stay until the end to hear about our upcoming Mother’s Day promo!

Today we thought we would share a few of our favourite nail designs that will sure brighten your day and give you more ideas! Let’s go!

Best Spring Gel Nails Vancouver | Prép Beauty Parlour

Let’s start off with our favourite set of spring! In this set we used the popular watercolour technique to transform a blank canvas into a dreamy and colourful set. Popped on some glitter and voila! This fantastic spring set! Built with Akzentz hard gel!

Best Spring Gel Nails Vancouver | Prép Beauty Parlour

Now THIS set is perfect for pastel lovers! Fun & Cutesy set with simple gold decor and pastel, hand painted bows!

Best Spring Gel Nails Vancouver | Prép Beauty Parlour

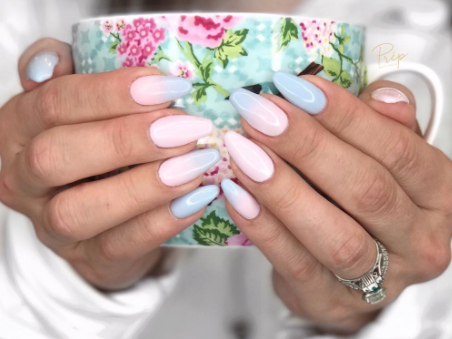
Ombré has been a huge and drastically increasing trend thats all over the hair world! So what about on nails? On this set we combined baby pink and blue to create this soft transitioning design. Subtle yet adds a POP of colour

Best Spring Gel Nails Vancouver | Prép Beauty Parlour

Can’t decide on which nail trend to settle for on your next set? Why not all! Daisies, gems, and negative space all look stunning on this set! Simply a gel mani spiced up! So fun!

Best Spring Gel Nails Vancouver | Prép Beauty Parlour

Delicate, elegant, perfect for all those outdoor tea parties and picnics! Blush pinky tones are perfect for people who want a subtle look to their nails yet crave a healthy nail colour topped off with… designs! Check out that hand painted lace!

Best Spring Gel Nails Vancouver | Prép Beauty Parlour

More DAISIES! Marc Jacobs inspired! So fun and sophisticated at the same time!

To book for a mani+pedi session with your mum,

Call or text us at 604-764-6452 to reserve your space! Hurry! Spaces are quickly running out!

For a limited time only, until May 14th, Prép Beauty Parlour will be having a gift card promotion!

Best Mothers Day Promo Vancouver | Prép Beauty Parlour

and don’t worry! Payment can be made in person at our salon on 1305 Burrard Street, or via phone! Just call 604-764-6452.

See you and your mom soon!

Prép Beauty Parlour is located at 1305 Burrard Street in beautiful downtown Vancouver, British Columbia. We specialize in nails, eyelash extensions, waxing, massages, facials, event/bridal hair & makeup. We’d love to hear from you! Email inquiries to [email protected]. Call us at 604-764-6452. Check out our 5 Star Yelp page here! Don’t forget to follow and like our Instagram and Facebook pages! https://www.facebook.com/prepbeautyparlour

Floral Pink Long Gel Extension Vancouver| Prép Beauty Parlour

Japan to Vancouver DIY Nail Art III | Prép Beauty Parlour

By | DIY, Nails, Prép Beauty Parlour

unknown

Floral Pink Long Gel Extension Vancouver| Prép Beauty Parlour

Floral Pink Long Gel Extension Vancouver| Prép Beauty Parlour

Hello! Welcome back to another DIY Nail art series! Today’s nail tutorial does require previous experience in nail design and may be difficult for beginners. We will be using a variety of brushes and colours in order to achieve this look. The gold and the pink make for a perfect match and the delicate floral design is the most stylish way to say good-bye to Winter, and hello to Spring and Summer!

This tutorial will be guided by Prép Nail Technician Kiyomi as she demonstrates how to achieve such delicate flowers! Often times, these flowers will be drawn by acrylic as it is easier to handle the brush and it’s simple ‘press’ to mould style. Do not fret! Prép is here to guide you through this cute nail art!

This set of nails is done on gel extensions! Our Prép Nail Technicians apply a nail form to your nail and carefully build the nail using sculptured gel to ensure the nail is suitable for your nail shape and curve.

Let’s begin!

~

Difficulty Level: ♥♥♥♥♡

Materials:

♥Nail Brushes

♥OPTIONS colour in SIMPLY PINK

♥OPTIONS colour in GOLDEN TWILIGHT

♥Top & Base hard gel (or polish!) Ours is from Azkentz

♥ OPTIONAL: White gel colour

STEP 1: As always, prép your nail bed properly and apply your desired top coat!


Gel Extension | Prép Beauty Parlour

Gel Extension | Prép Beauty Parlour

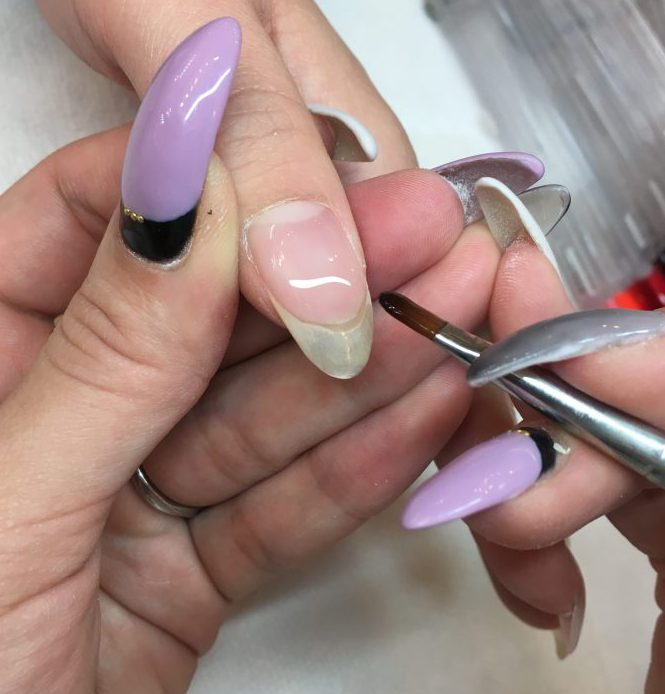
STEP 2- We then applied GOLDEN TWILIGHT to some of the fingers, index and ring finger on one hand, and index and pinky on the other. However it is completely up to you! As GOLDEN TWILIGHT comes off sheer, you may want to apply several coats to achieve a more opaque look.

Gel Extension | Prép Beauty Parlour

Gel Extension | Prép Beauty Parlour

Gel Extension | Prép Beauty Parlour

Gel Extension | Prép Beauty Parlour

STEP 3- We then applied SIMPLY PINK to the rest of the fingers. If you prefer a lighter pink, that would look adorable as well! However, this bright pink is super bold and is adorable for the spring time.

Gel Extension | Prép Beauty Parlour

Gel Extension | Prép Beauty Parlour

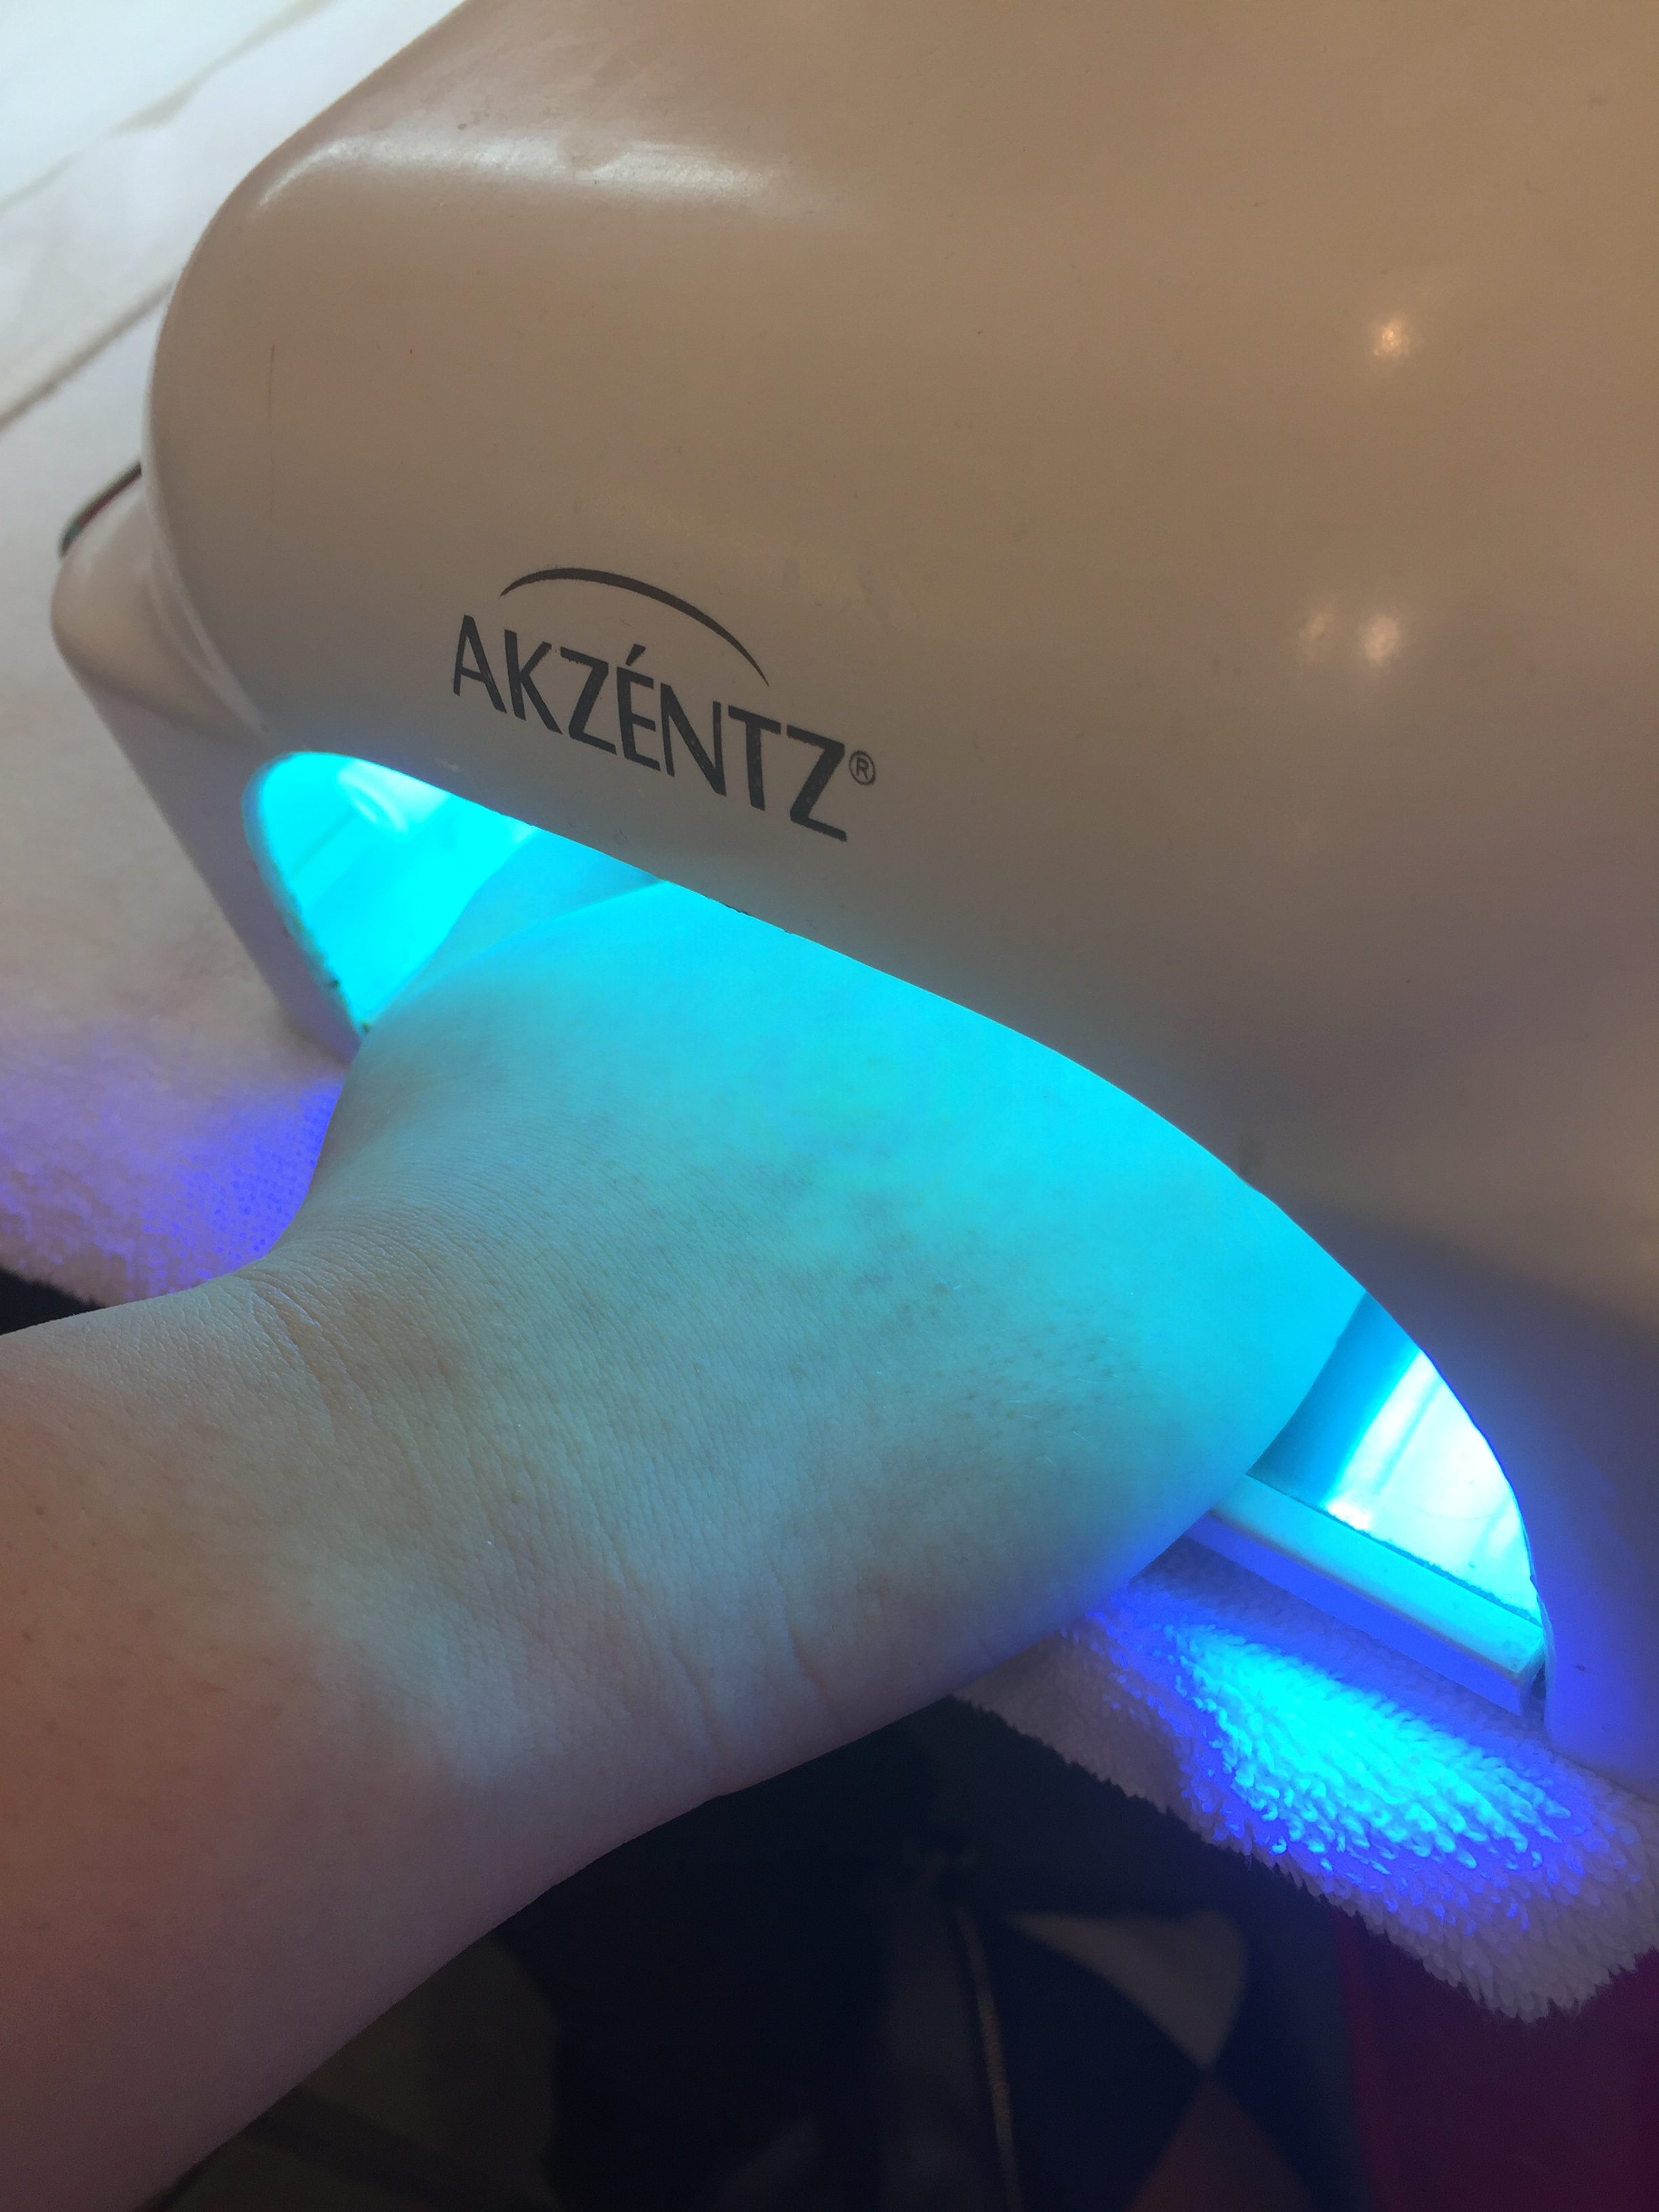
STEP 4- Remember ladies!! To cure your nails between every coat and layer to ensure they are fully dry and cured!

Gel Extension | Prép Beauty Parlour

Gel Extension | Prép Beauty Parlour

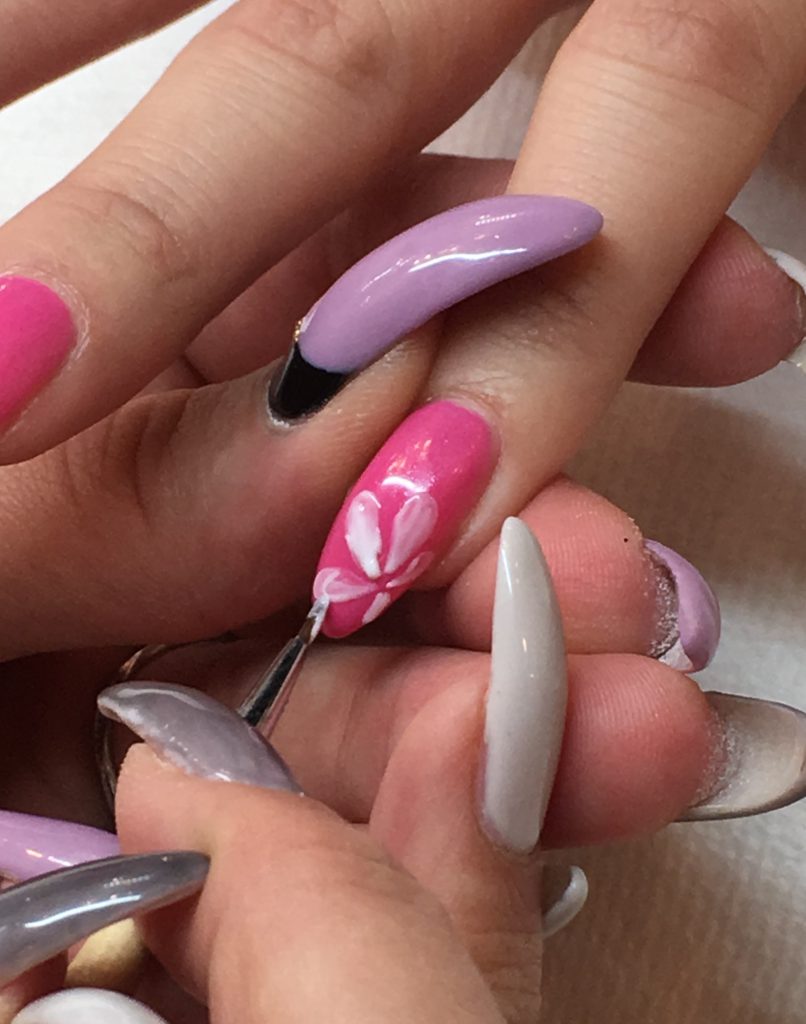
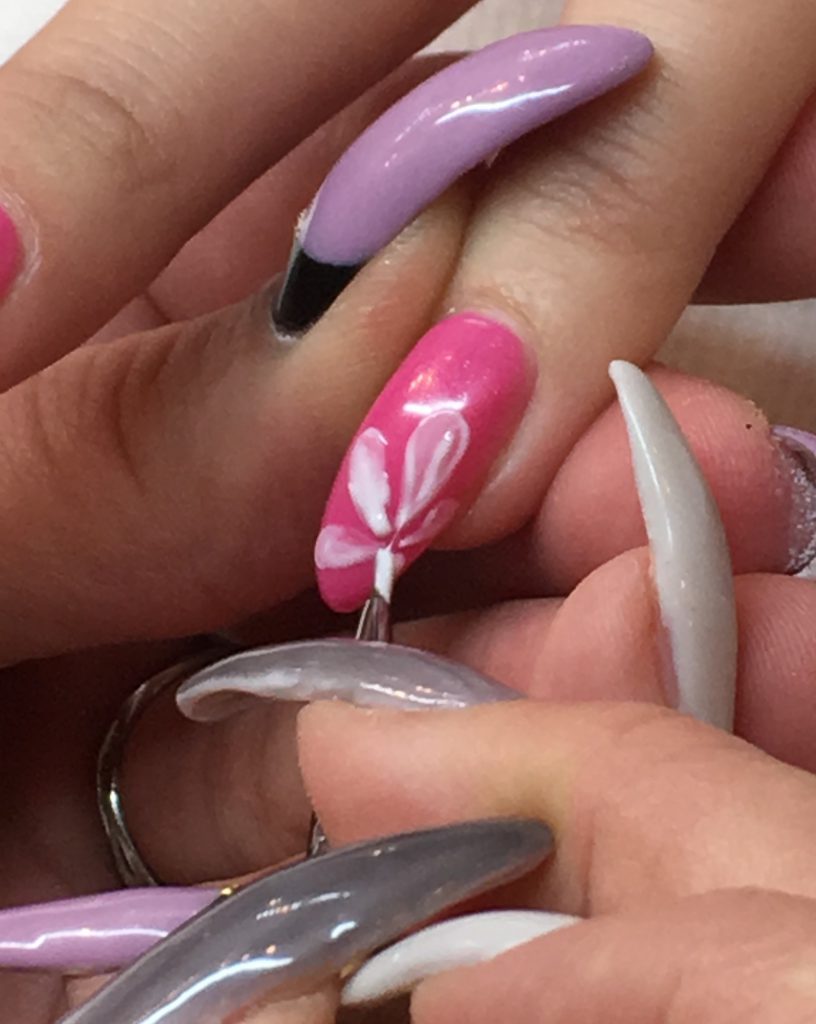
STEP 4- Cure that pink and then we will move onto the nail design! We start off the art by simply drawing a stroke on the lashes. Applying the top with slightly more pressure to create the look of flower petals.

Gel Extension | Prép Beauty Parlour

Gel Extension | Prép Beauty Parlour

STEP 5- After a light layer of the petals have been painted on, go over the petals again to get the opaque and desired look.

Gel Extension | Prép Beauty Parlour

Gel Extension | Prép Beauty Parlour

Gel Extension | Prép Beauty Parlour

Gel Extension | Prép Beauty Parlour

STEP 6: After you’ve painted on the flowers, you can also add dots surrounding the nail just as we’ve done in the photos. Remember to cure between every layer!

Gel Extension | Prép Beauty Parlour

Gel Extension | Prép Beauty Parlour

STEP 7: When you are fully satisfied with your UBER chic nails, simply apply and cure your top coat, wipe your inhibition layer, and you are good to go!

Now you can flaunt your nails and wipe away all the winter blues that the heavy snowfall that Vancouver brought to Prép in January and February!

Floral Pink Long Gel Extension Vancouver| Prép Beauty Parlour

Floral Pink Long Gel Extension Vancouver| Prép Beauty Parlour

Floral Pink Long Gel Extension Vancouver| Prép Beauty Parlour

Floral Pink Long Gel Extension Vancouver| Prép Beauty Parlour

Floral Pink Long Gel Extension Vancouver| Prép Beauty Parlour

Floral Pink Long Gel Extension Vancouver| Prép Beauty Parlour

Be sure to tag us on Instagram (click HERE), and Twitter (click HERE), to showcase your own variations of this adorable mani!

♡♡♡

Prép Beauty Parlour is located at 1054 Hornby Street in beautiful downtown Vancouver, British Columbia. We specialize in nails, eyelash extensions, waxing, massages, facials, event/bridal hair & makeup. We’d love to hear from you! Email inquiries to [email protected]. Call us at 604-764-6452. Check out our 5 Star Yelp page here! Don’t forget to follow and like our Instagram and Facebook pages! https://www.facebook.com/prepbeautyparlour

Japan to Vancouver DIY Nail Art II | Prép Beauty Parlour

By | DIY, Event, Nails, Prép Beauty Parlour

screen-shot-2017-02-17-at-2-18-40-pm img_3887

Hello and welcome back to the Prép blog! If you enjoyed last week’s Japan to Vancouver nail art series, then we got news for you! We are back again this week to showcase another DIY nail art that you can do at home! At Prép we understand how busy all you ladies and gents are, and sometimes, there simply just ISN’T enough time to make the trip to the nail studio- but that’s totally okay! That’s what we’re here for today!

Today’s nail art features uses of our favourite– bling, our take at the famous ‘Hokuri’ nail trend, and the ever so popular Instagram baddie pattern of camouflage styles! It’s a soft combination of traditional soft Japanese nail art watercolour art (Hokuri) and the camo- military style.

Hokuri is a type of Japanese nail art that often uses sponges or other tools to imitate a jelly, dream like essence. It’s a perfect way to up your nail game while still being subtle (for those busy bees at work 😉 !!) Many nail technician will use a mixture of acrylic paints, but today we will show you a quicker way to create this beautiful art using gel polishes you already have!

To learn more on how to recreate this cute yet daunting look, keep reading!

Difficulty Level: ♥♥♥♡♡

Materials

Materials

Materials:

♥Nail Brushes

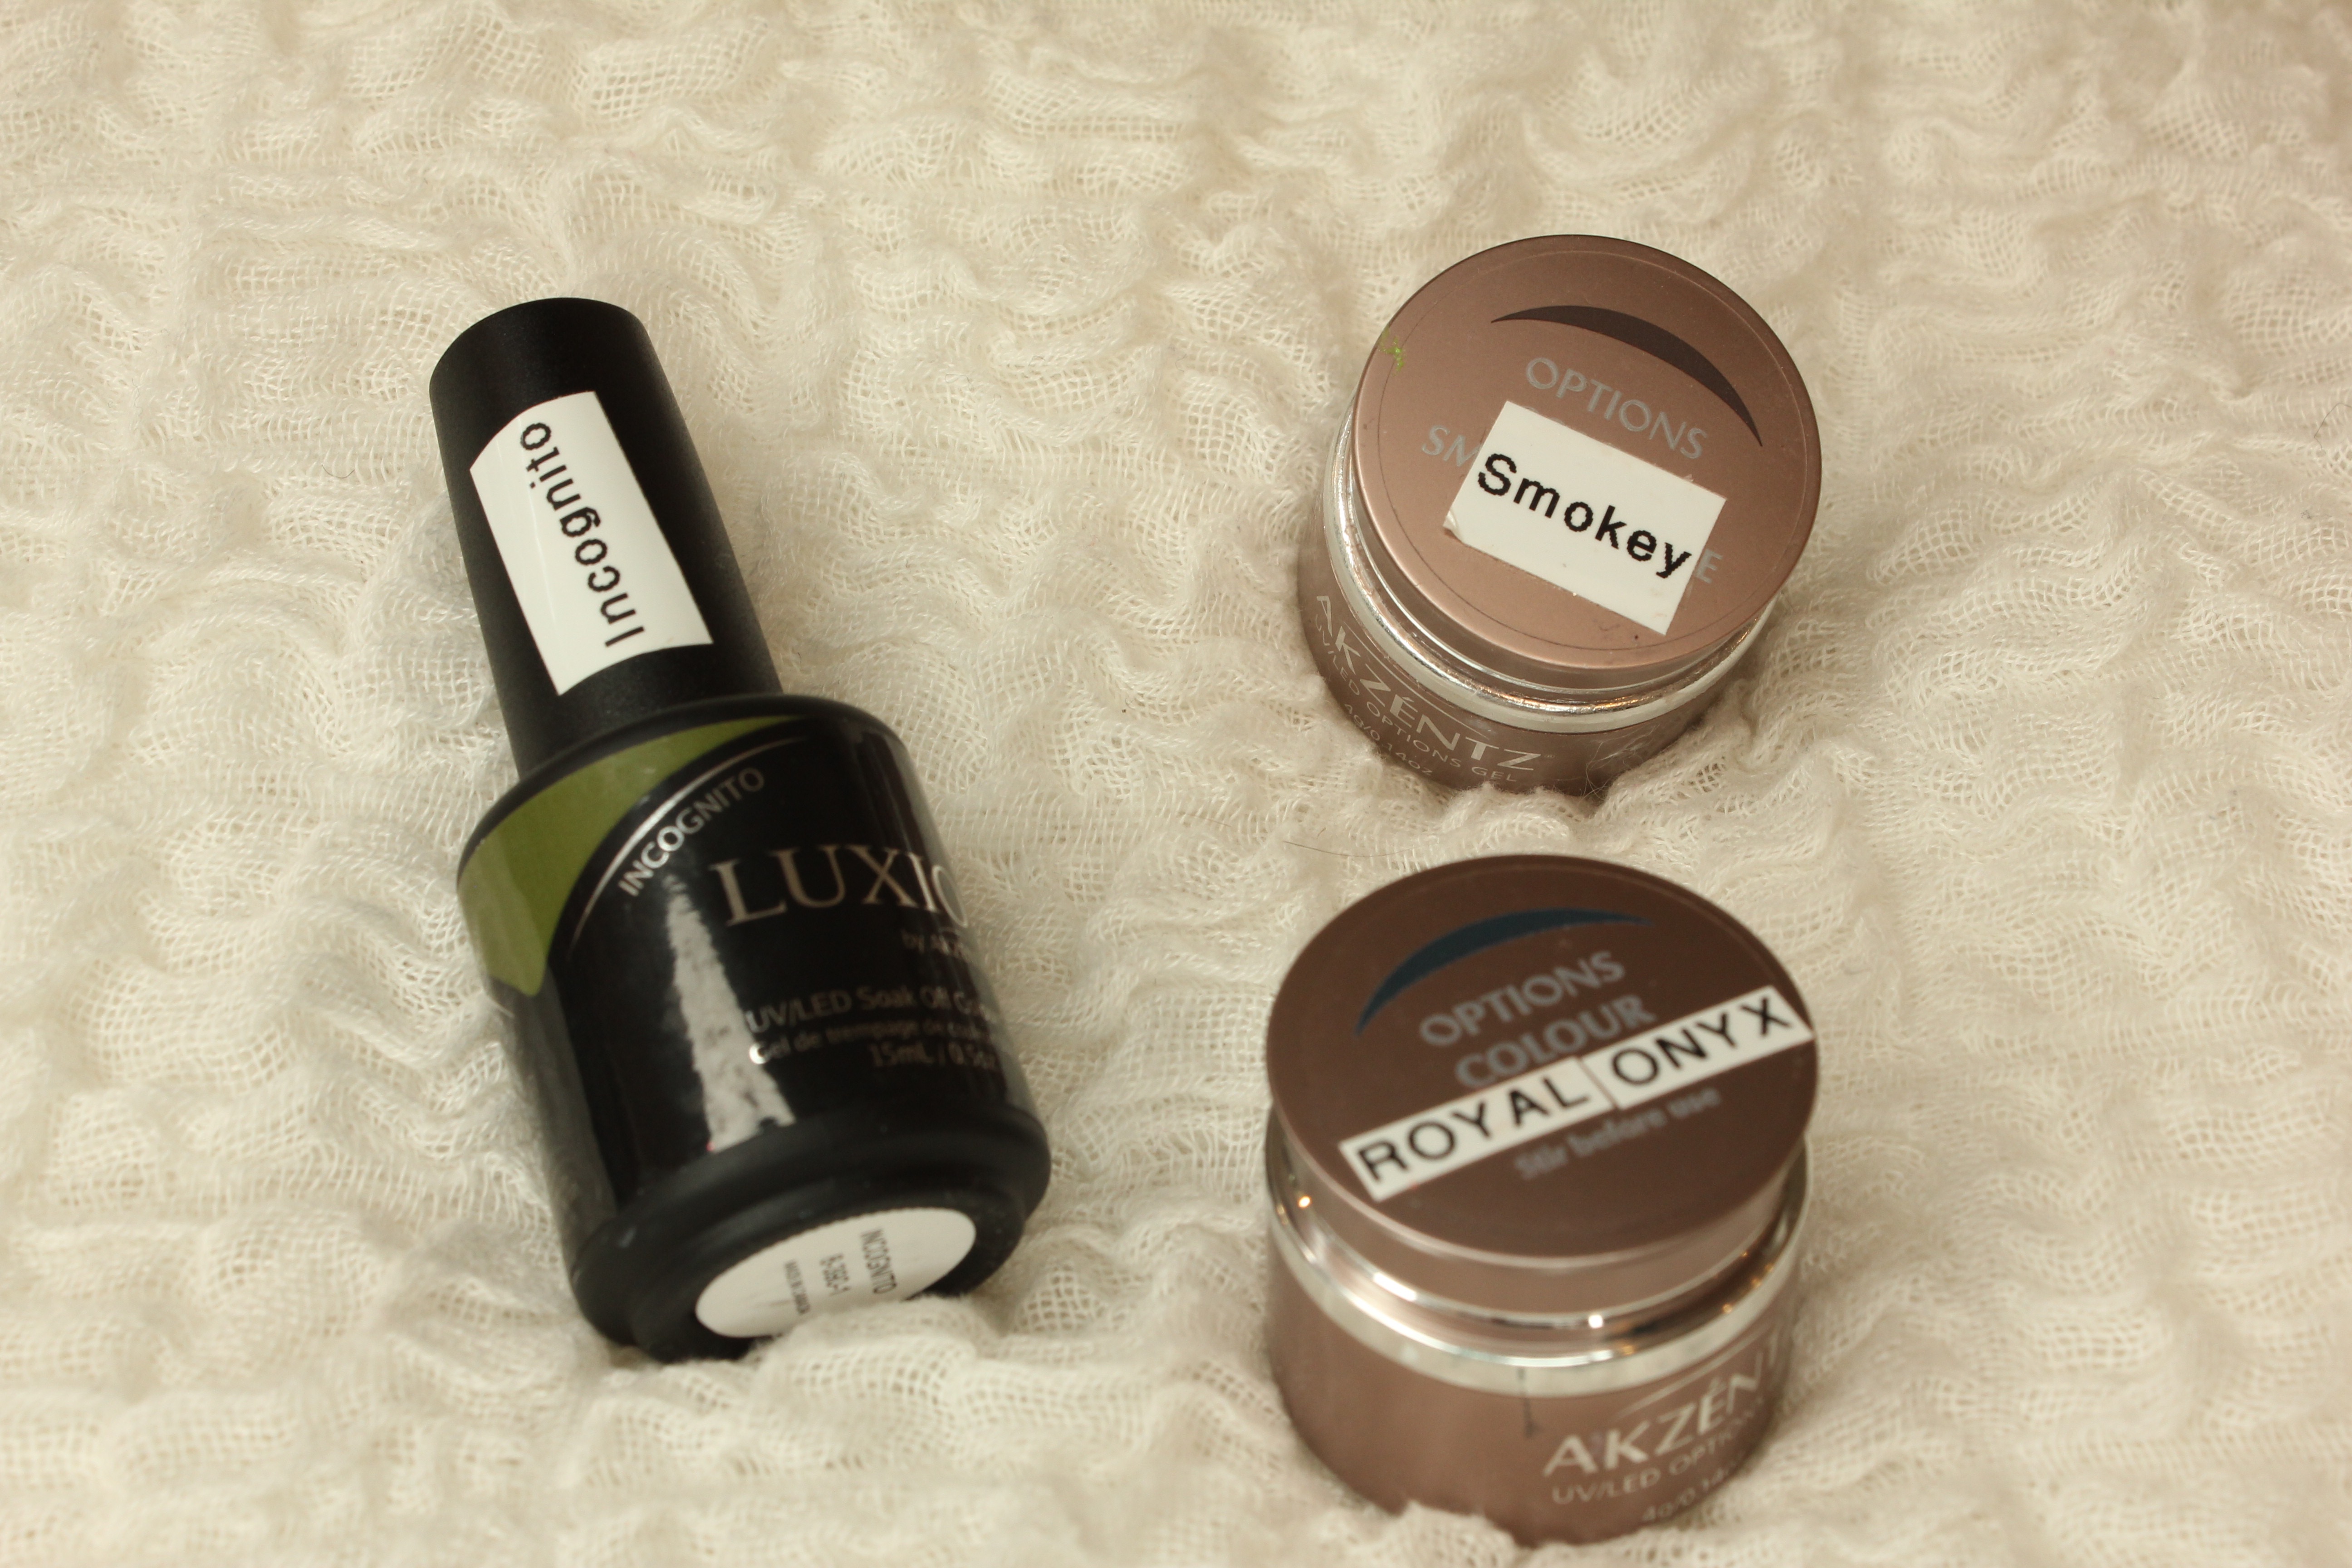
♥LUXIO colour in Incognito

♥OPTIONS colour in SMOKEY

♥OPTIONS colour in ROYAL ONYX

♥Bling or gems

♥Nail decals

♥Top & Base hard gel (or polish!) Ours is from Azkentz

Let’s Begin!

Step 1: As always, we want to prep the cuticle and surface of the nail before moving onto adding any gel polishes to ensure the life of the gel mani. Remember ladies- Dry cuticles mean gel polishes won’t stay on!

Step 2: Just like how we begin any other nail tutorial, apply the base coat to your nails first!

img_0986

Step 3: We then painted all of the nails in the colour SMOKEY as the ‘base’ colour

img_3878

Step 4: We cannot stress this enough!! Cure your nails in a UV/LED Lamp after each coat and layer to ensure the nail is fully ‘dry’, and thus will not be bumpy or squishy!

img_3885

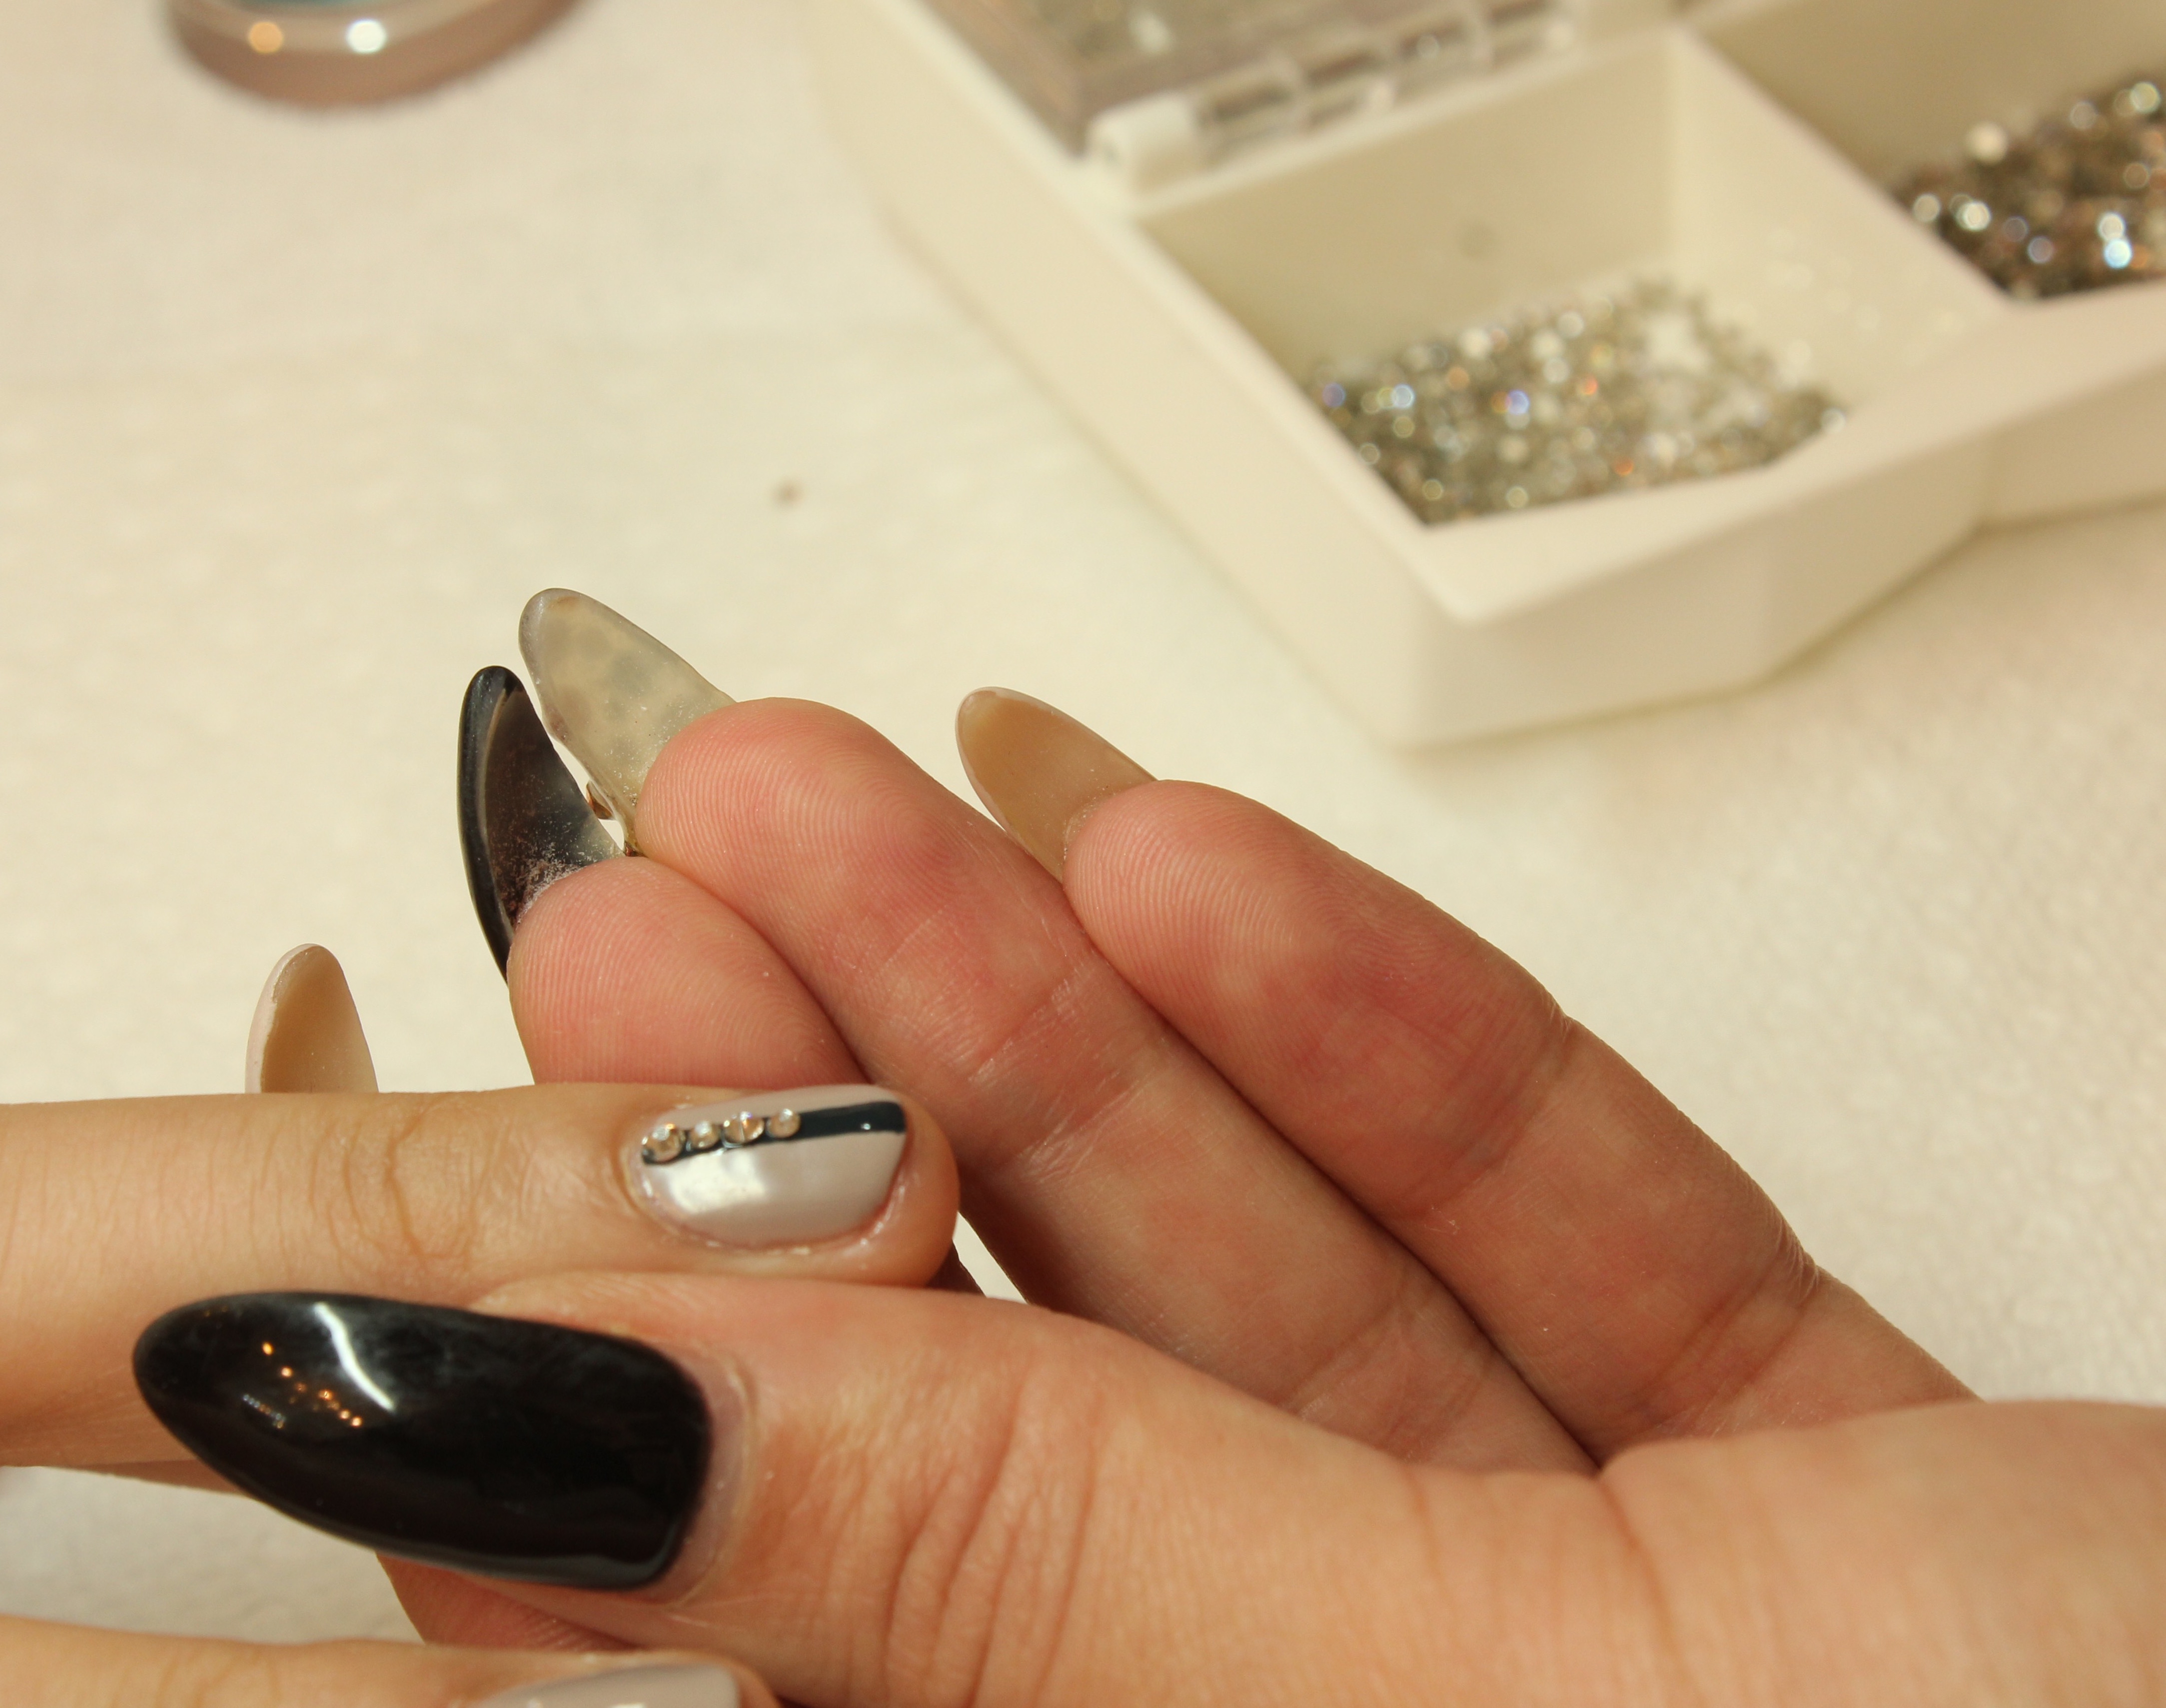
Step 5 & 6 : Paint a line down the centre of your middle finger as well as the thumb on the other hand (that doesn’t already have the line), using ROYAL ONYX. CURE IT! Then add another clear coat and BEFORE you cure it, add some of the smallest gems/bling you own along the line. And then cure it!

~ We also used a pick tool to move the gems onto ROYAL ONYX to ensure they are lined up to perfection!

img_3846 img_3847 img_3849 img_3854

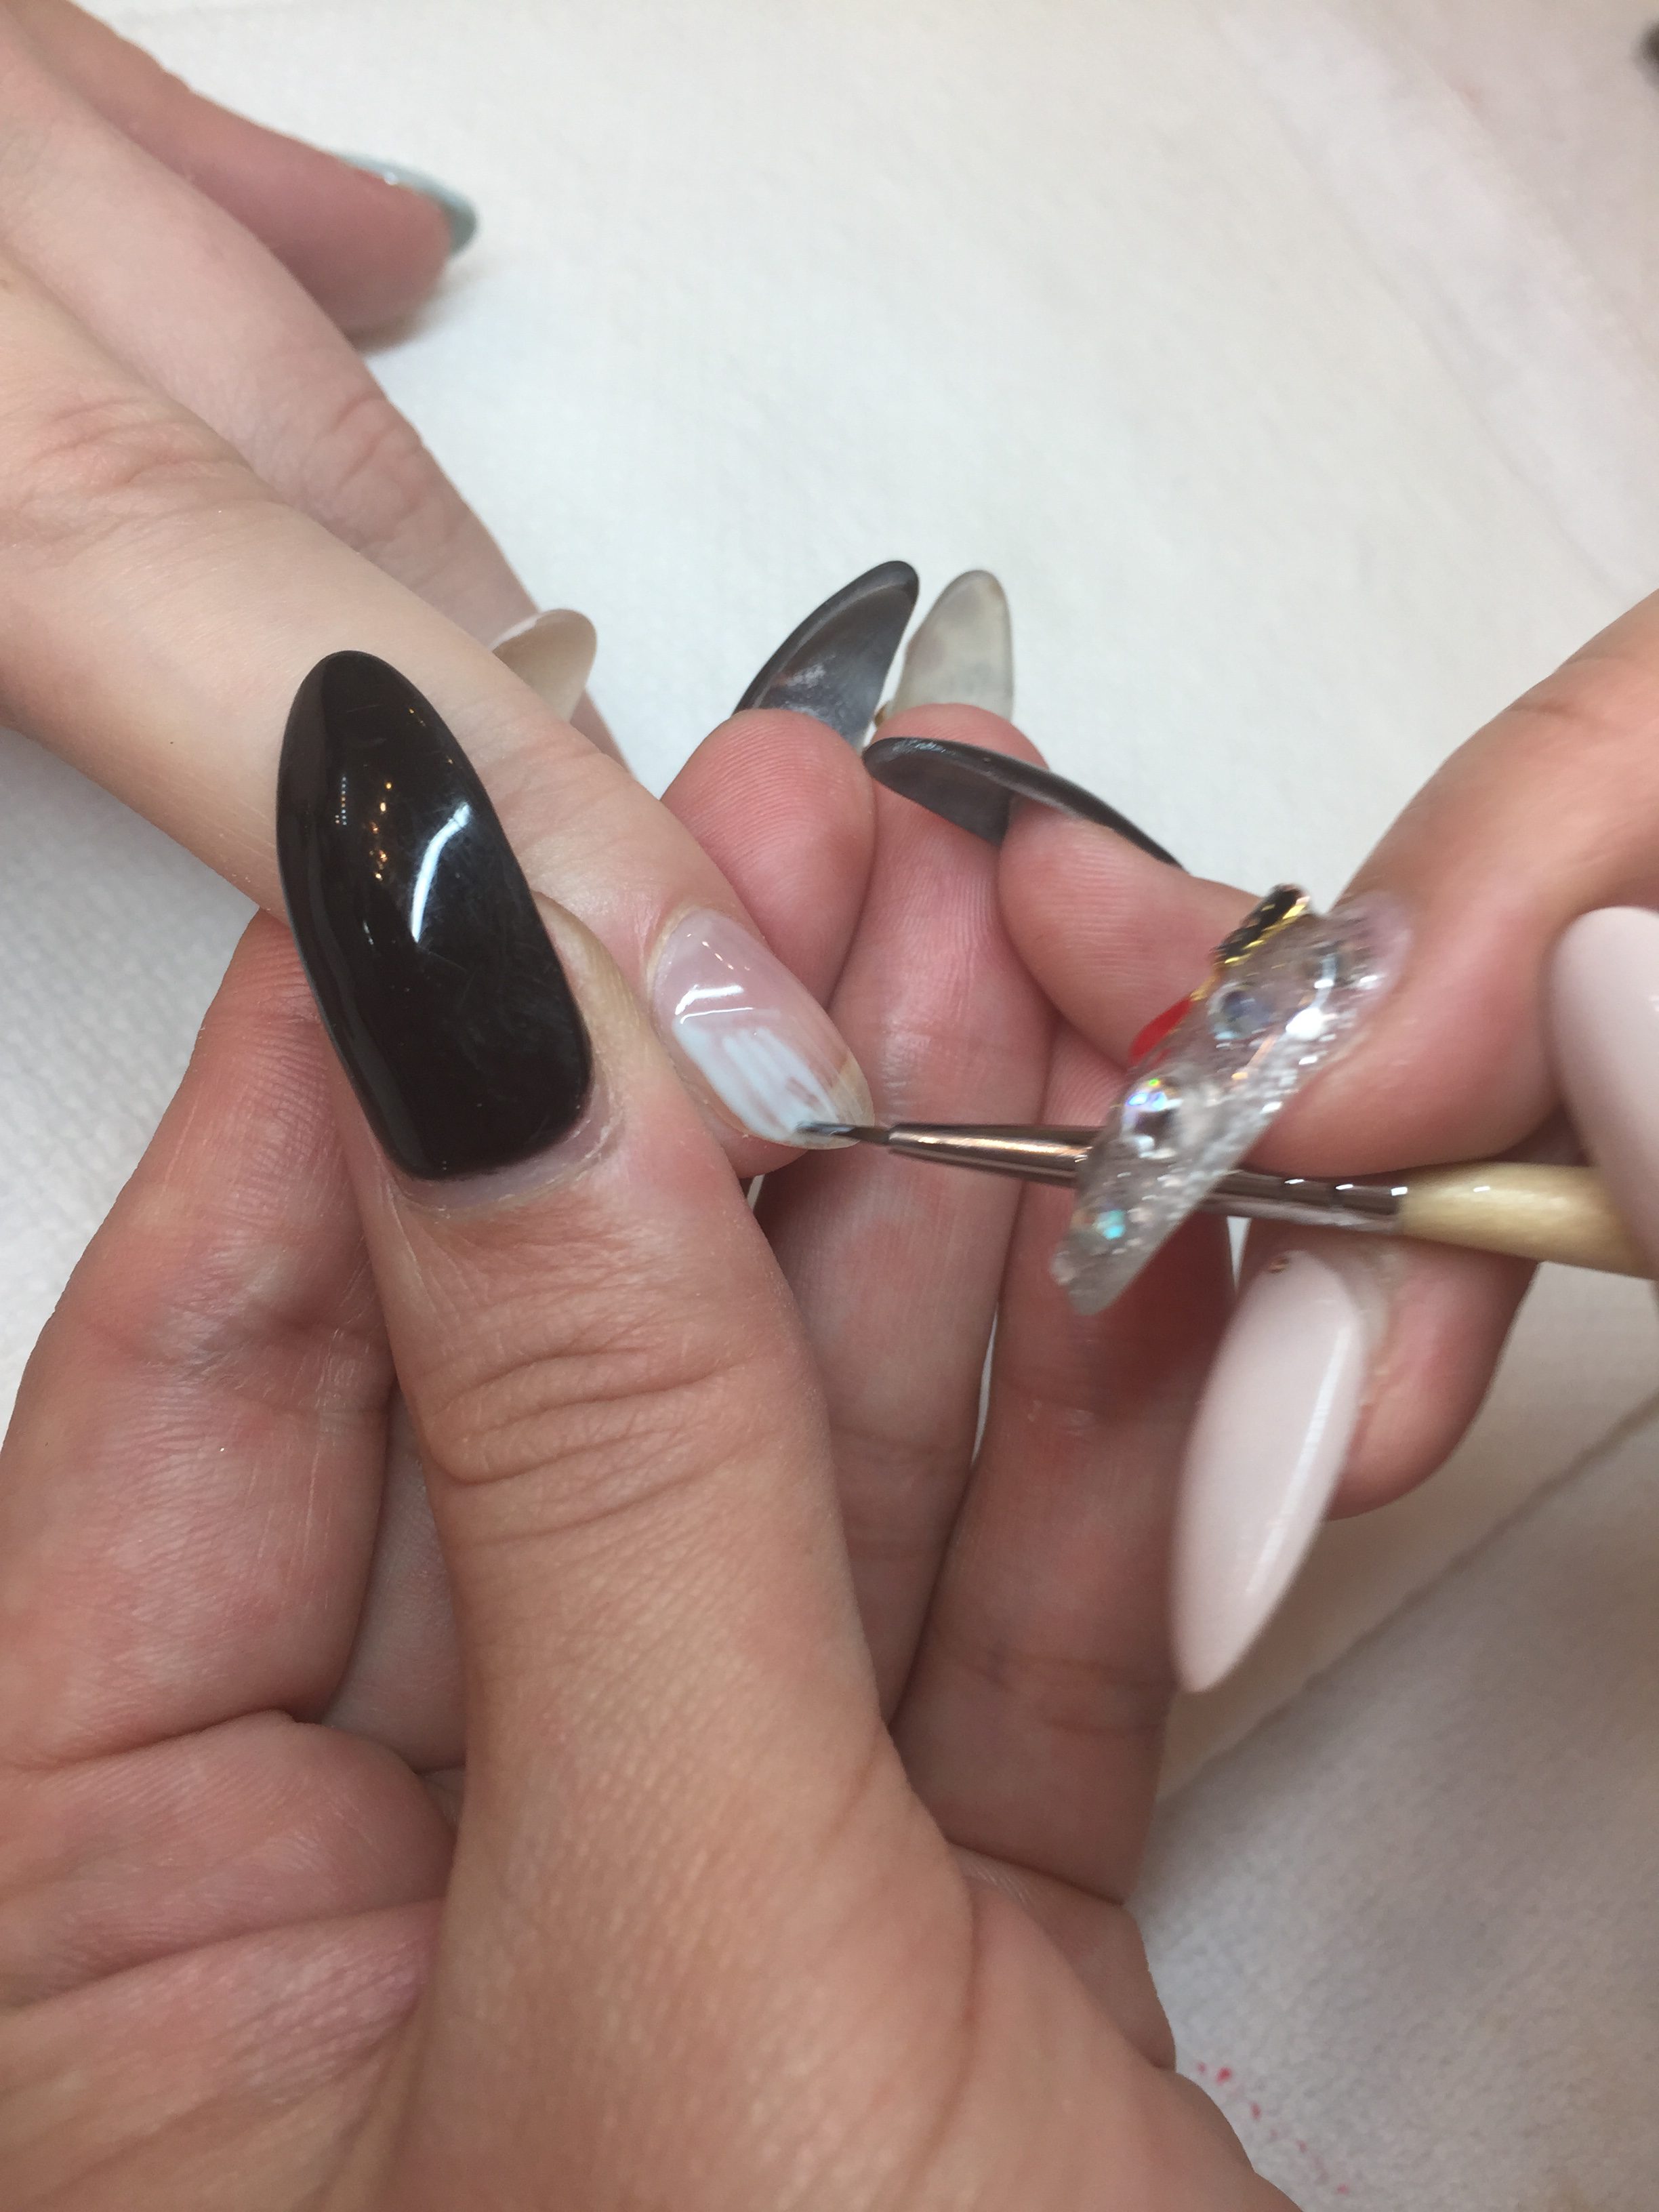
Step 7: Taking ROYAL ONYX with a small precision brush, draw small strokes onto your ring and thumb as well as pointer and ring on the other hand. Kiyomi shows us how to draw a desired style down below!

img_3857

img_3858

Step 8: Taking a clear hard gel (remember to wipe off your brush!), lightly ‘swirl’ the colour and blend it as shown below:

img_3859

Step 9: Taking INCOGNITO, swirl the colours to create a more dimension as shown like so:

img_3866

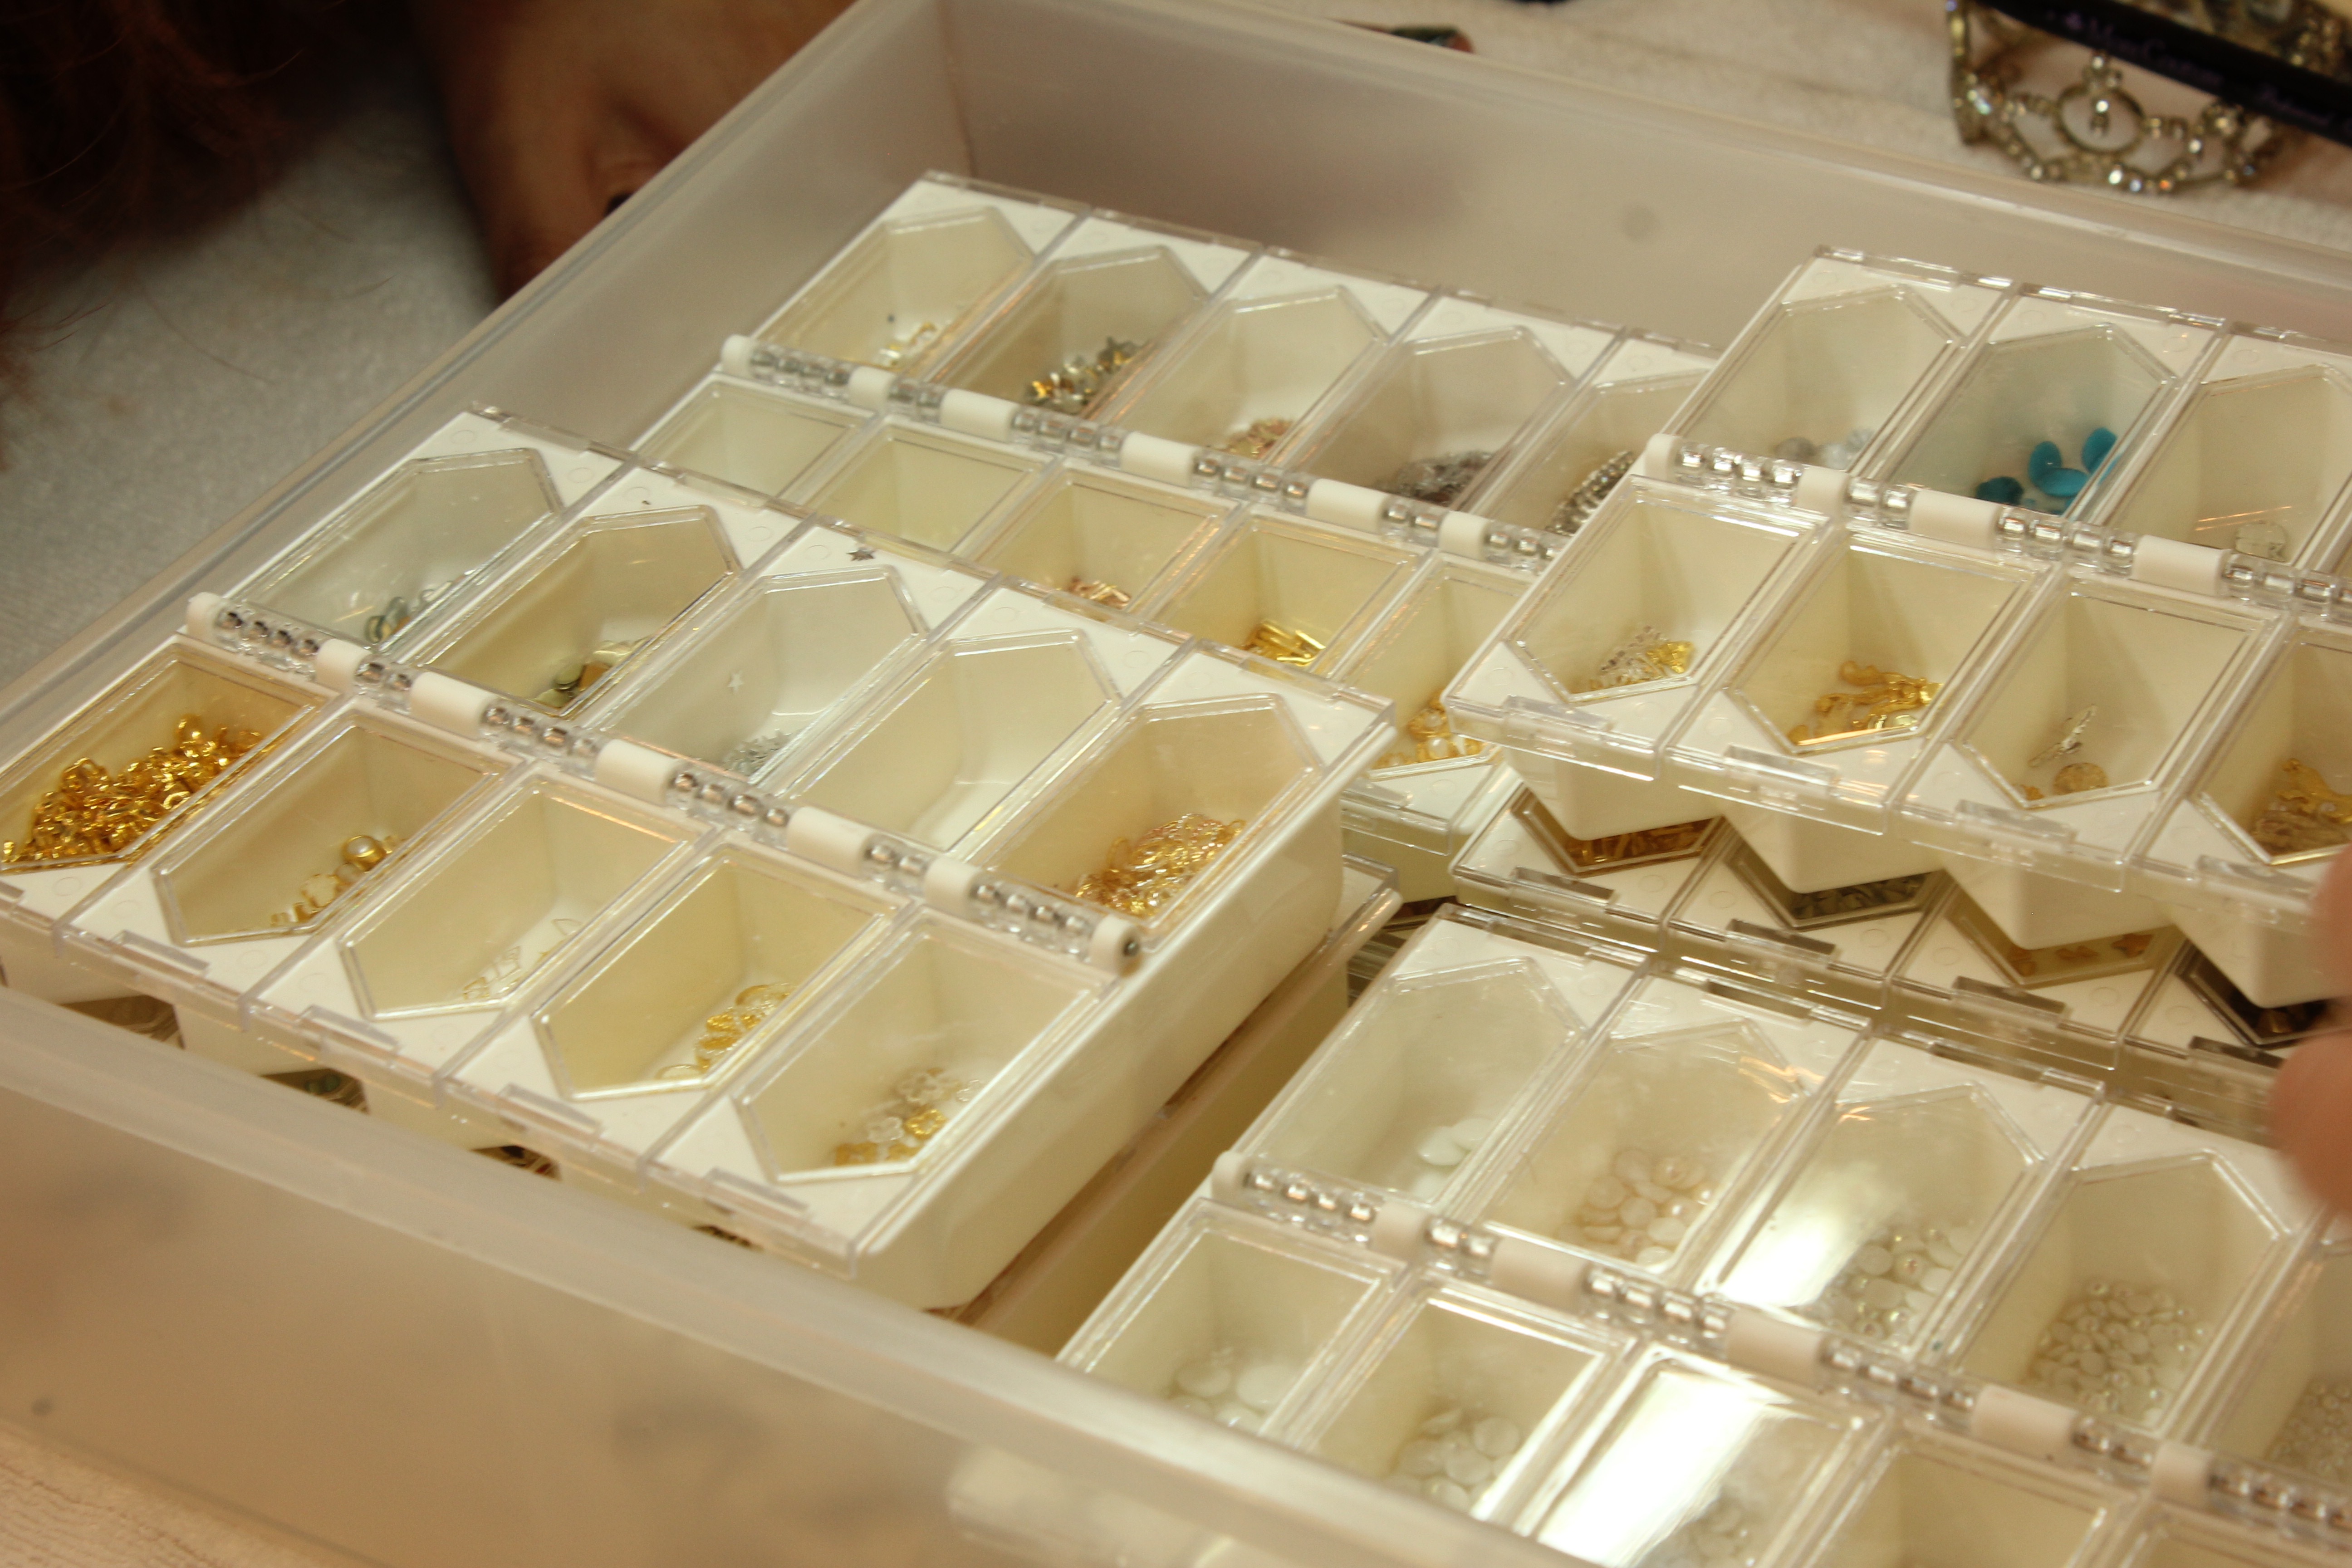
Nail Decal time! At Prép, we love to experiment with tons of new designs and shapes! Check out a sneak peek of our collection below:

img_3870

Step 10: We decided to add a simple Crown to one of the plain SMOKEY fingers, as well as a delicate V piece:

img_3871

screen-shot-2017-02-17-at-2-18-40-pm

There it is folks! Our recreation of a nail design, as well as one of the ways we like to present the Hokuri nail art!

Be sure to tag us on Instagram (click HERE), and Twitter (click HERE), to showcase your own variations of this adorable mani!

♡♡♡

Prép Beauty Parlour is located at 1054 Hornby Street in beautiful downtown Vancouver, British Columbia. We specialize in nails, eyelash extensions, waxing, massages, facials, event/bridal hair & makeup. We’d love to hear from you! Email inquiries to [email protected]. Call us at 604-764-6452. Check out our 5 Star Yelp page here! Don’t forget to follow and like our Instagram and Facebook pages! https://www.facebook.com/prepbeautyparlour

Japan to Vancouver DIY Nail Art | Prép Beauty Parlour

By | DIY, Nails, Prép Beauty Parlour
Nails by Kiyomi | Prép Beauty Parlour

Nails by Kiyomi | Prép Beauty Parlour

Since the dawn of literally FOREVER, Japan has been the hotspot and leader in fashion, hairstyle, and our personal favourite, NAIL ART!

Often cute and quirky, Japanese nail art is unique and fun to have on your nails. Styles often use geometric patterns, negative space, stickers, or hand drawn art. Eccentric nail art is a MUST-HAVE fashion accessory to amp up your next gel manicure appointment!

No time to drop in for your gel mani? Not to fret! We have the perfect idea to bring the art to you! Below we will be showing you how to recreate the design as listed above!

Prép Beauty Parlour is home to many talented and creative nail technicians (as well a lash techs and make-up artists of course!), and today our very own nail technician Kiyomi will be recreating a cute style of nail art!

Kiyomi is a nail technician who studied Japanese nail art in well– Japan! She is always full of creative ideas and we are more than happy to have the trends in Japan be brought into our very own salon!

Kiyomi Nail Tech

Kiyomi Nail Tech

This will be the nail art look that we are recreating! Let’s Begin!

img_1017

Difficulty Level: ♥♥♡♡♡

Materials:

♥Nail Brushes

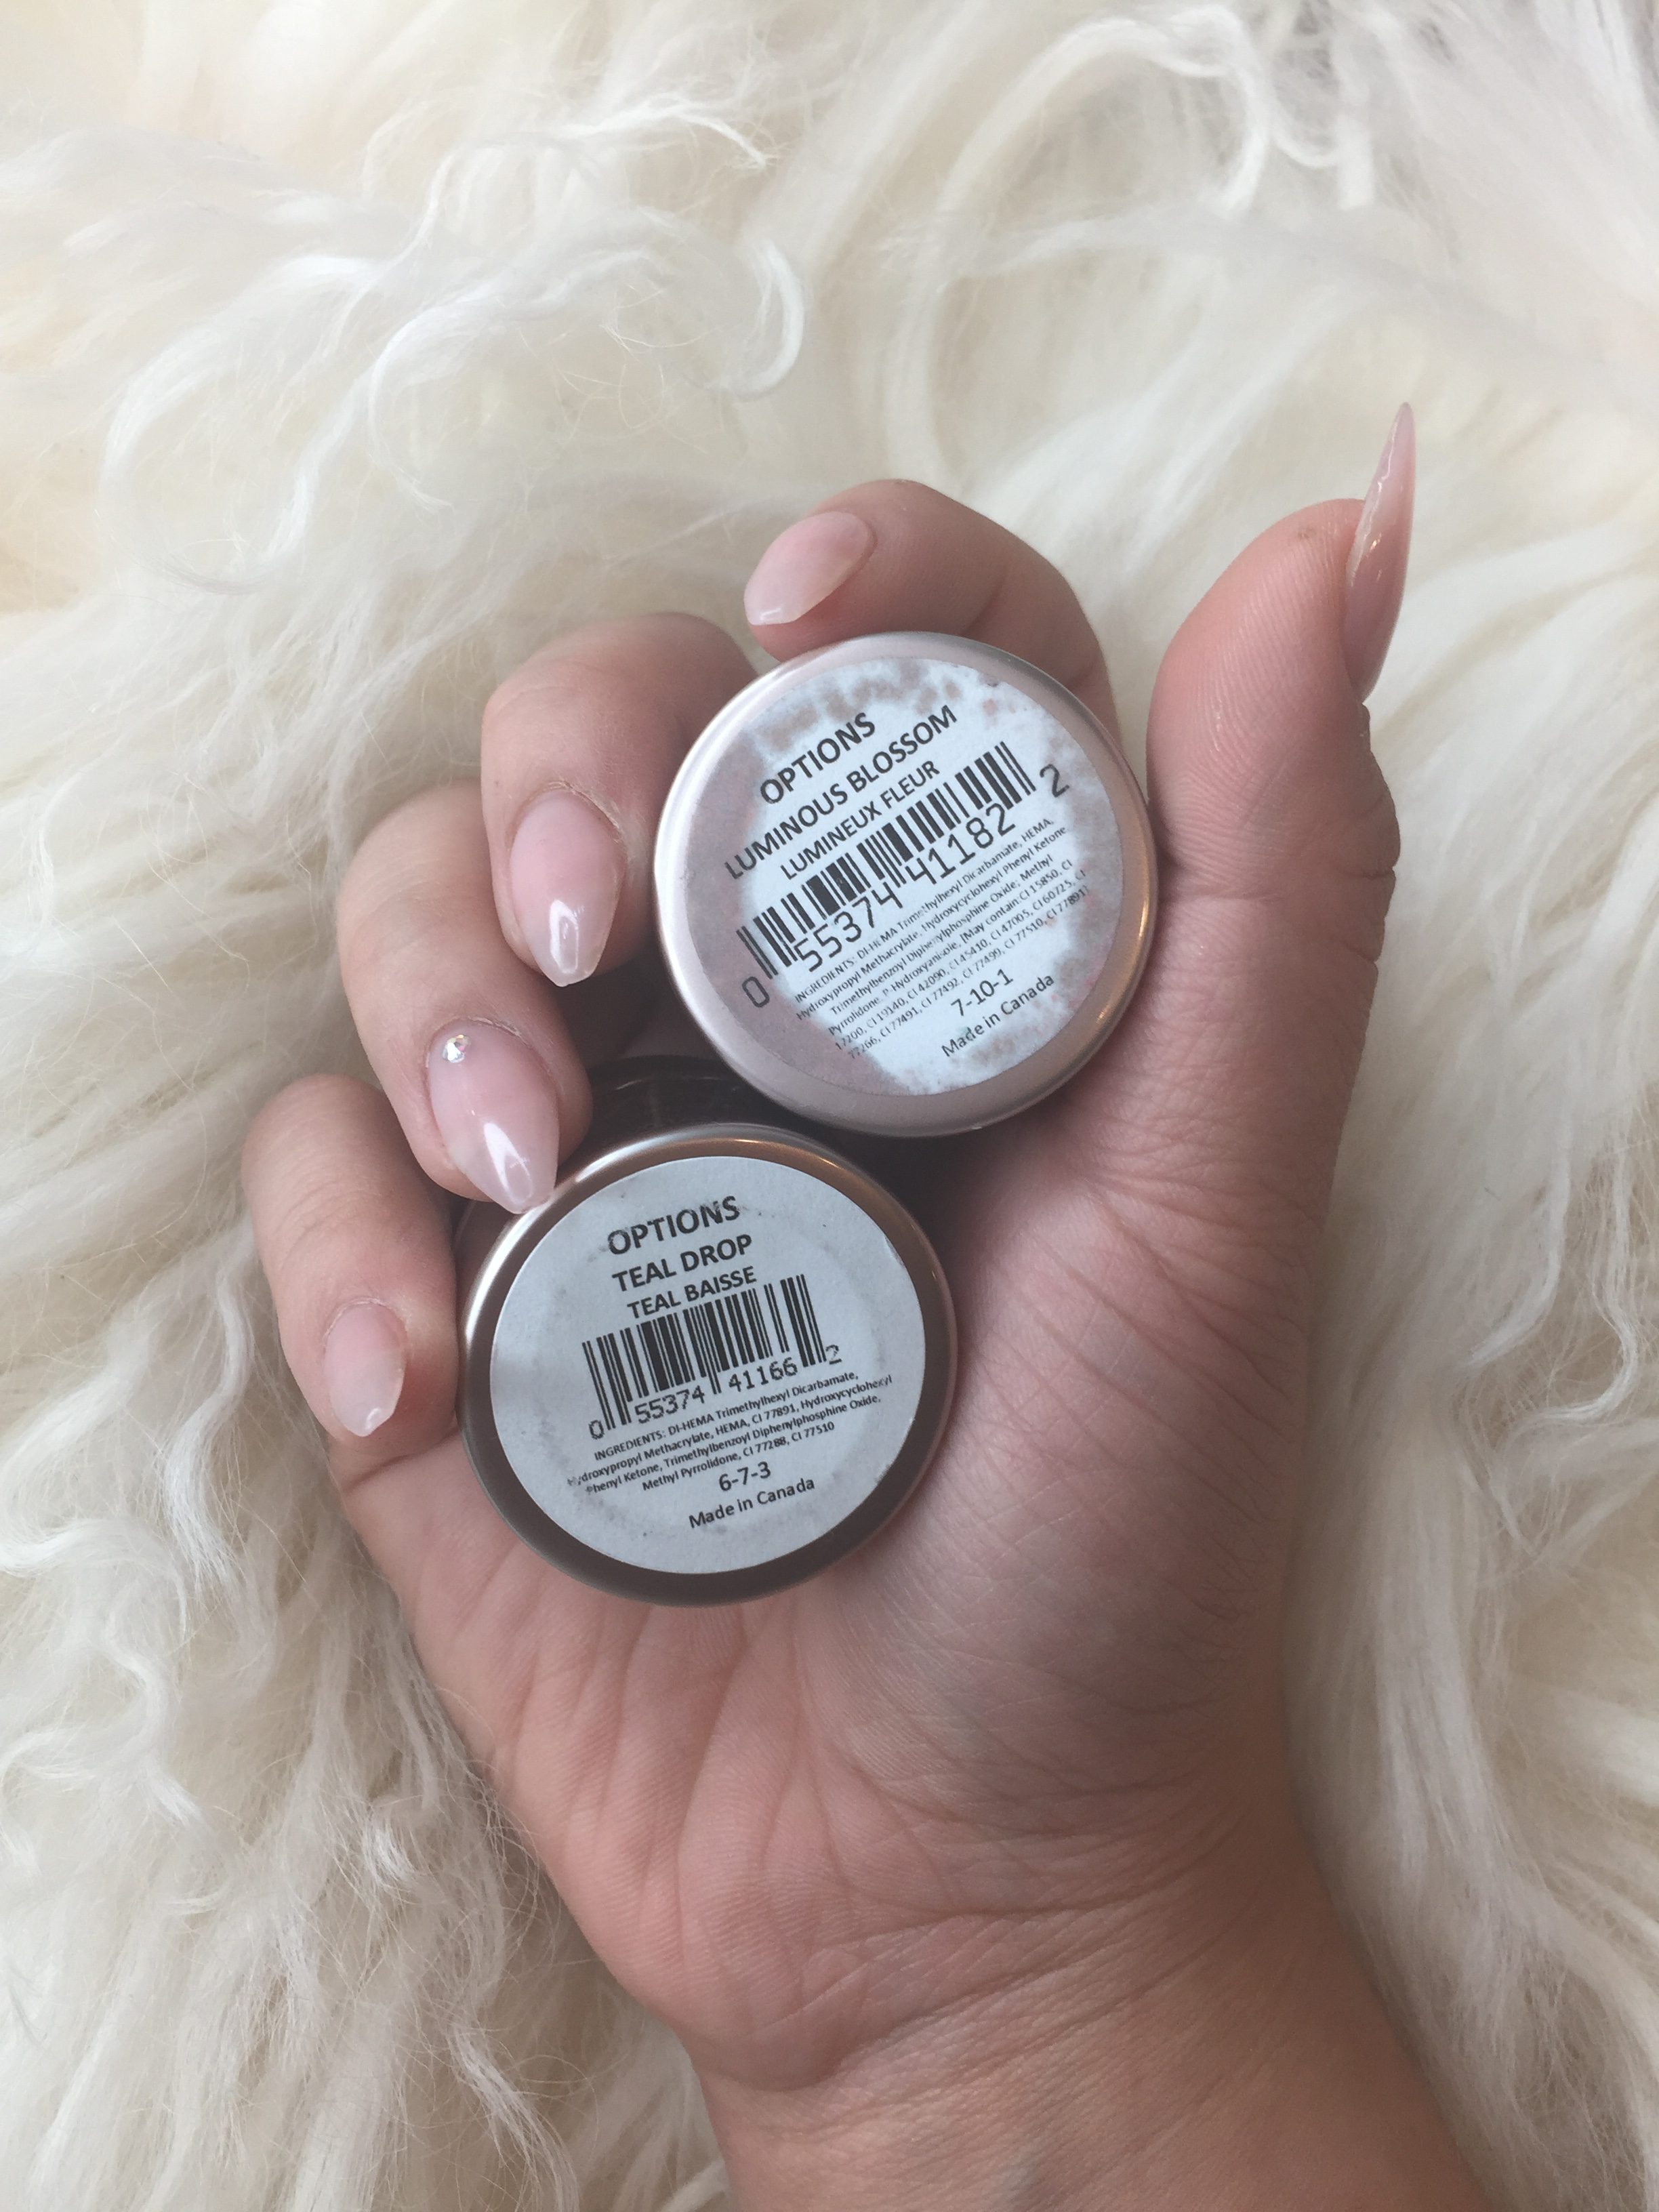
♥OPTIONS colour in LUMINOUS BLOSSOM

♥OPTIONS colour in TEAL DROP

♥Top & Base hard gel (or polish!) Ours is from Azkentz

♥ OPTIONAL: White gel colour

Get your gel pots ready!

Get your gel pots ready!

Step 1: Prép your nail!

Step 2: Base coat of hard gel!

img_0986

Step 3: Remember to cure your nils in a UV/LED light after each coat or layer!

Remember to cure your nils in a UV/LED light after each coat or layer!

Remember to cure your nils in a UV/LED light after each coat or layer!

Step 4: Mix and apply Luminous Blossom to the ring and pinky fingers!

img_0990

Step 5: Mix and apply Teal Drop to the pointer and thumb

Mix Mix Mix Mix!

Mix Mix Mix Mix!

OPTIONS: TEAL DROP

OPTIONS: TEAL DROP

Step 6: Using Teal Drop, carefully carve out the outline design as shown below on the . img_0995 img_0996 img_0997

Step 7: Fill in the outline to darken up the colour and increase it’s opacity.

img_0998

Step 8: On the same fingers, carve the outline as you did with TEAL DROP but use LUMINOUS BLOSSOM on opposing sides like so..REMEMBER TO CURE BETWEEN EACH LAYER!

img_1001-copy img_1001

Step 9: Take a thicker and denser brush (like the one we use for our eyebrows, ladies!) And darken TEAL DROP and LUMINOUS BLOSSOM again- REMEMBER TO CURE BETWEEN EACH LAYER!

img_1002 img_1003

Step 10:  We decided to add a little bit of line art to finish up the look, first, draw a triangle at the base, followed by a straight line.

Step 11: Apply a shine or matte top coat if desired!

Step 12: Using rubbing alcohol on a lint-free pad, wipe off the inhibition layer.

img_1012

Step 13: Clean up any edges, file the shape a little to fit to perfection!

img_1013

Finished! Now you can flaunt your cute DIY nails! We’re in love! Stay tuned for more future DIYS!

 img_1018

Be sure to tag us if you followed this DIY as we would LOVE to see your take on it!

Check out our Instagram by clicking HERE.

Prép Beauty Parlour is located at 1054 Hornby Street in beautiful downtown Vancouver, British Columbia. We specialize in nails, eyelash extensions, waxing, massages, facials, event/bridal hair & makeup. We’d love to hear from you! Email inquiries to [email protected]. Call us at 604-764-6452. Check out our 5 Star Yelp page here! Don’t forget to follow and like our Instagram and Facebook pages! https://www.facebook.com/prepbeautyparlour